Thursday, November 7, 2024
How to build a cheap 8x12 shed from scratch

Alright, you want to build an 8x12 shed from scratch, but on a budget? Let's get this done! You'll be surprised how much you can achieve with a bit of elbow grease and some smart shopping.
Step 1: Planning & Designing Your Shed
Before you start throwing lumber around, we need a solid plan. This isn't a time for winging it!
Think about the shed's purpose: Storage for tools, a workshop, a mini-greenhouse? This will shape your design.
Draw it out: Sketch your shed on paper. Decide on things like door placement, window placement, and any internal shelving you want.
Get building codes: Check with your local building department for any regulations about shed construction. They might require permits or have specific guidelines for things like foundation types.
Foundation: A concrete slab is the sturdiest, but also the most expensive. A gravel base or pier foundation could save you money. Just make sure it's level!
Materials: Make a list of all the materials you'll need. Consider lumber, siding, roofing, windows, doors, hardware, and any insulation or finishing touches.
Time: Building a shed takes time, so factor that into your plan. Don't underestimate the learning curve if you're a DIY novice.
Step 2: Gathering Your Tools and Materials
Now it's time to hit the hardware store and get your hands dirty!
Essential Tools:
Tape measure
Level
Hammer
Saw (circular saw or a handsaw)
Drill
Screwdriver
Safety glasses
Work gloves
Materials:
Foundation: Gravel, concrete mix (if using a slab), or pressure-treated lumber for piers.
Framing: Pressure-treated lumber for the base, and standard lumber for the walls and roof. You'll need a combination of 2x4s and 2x6s.
Sheathing: Plywood or OSB (Oriented Strand Board) for covering the walls and roof.
Siding: Vinyl, wood, metal, or even reclaimed materials.
Roofing: Shingles, metal roofing, or even a DIY green roof.
Doors & Windows: Choose sizes that fit your needs and budget. Think about whether you need double doors for large items.
Hardware: Nails, screws, brackets, hinges, door handles, and window latches.
Optional: Insulation (fiberglass batts or foam board), house wrap, paint or stain for the exterior.
Step 3: Building the Foundation
The foundation is the bedrock of your shed, so get this right!
Gravel Base: Lay down a layer of gravel about 4-6 inches deep, compacted well. This provides drainage and helps stabilize the floor.
Concrete Slab: Level the ground, pour a concrete slab according to the dimensions of your shed. Use a form to create the edges.
Pier Foundation: Dig holes for posts, and fill them with concrete. Anchor the posts to the concrete for stability.
Step 4: Framing the Walls and Roof
Now things start to get exciting!
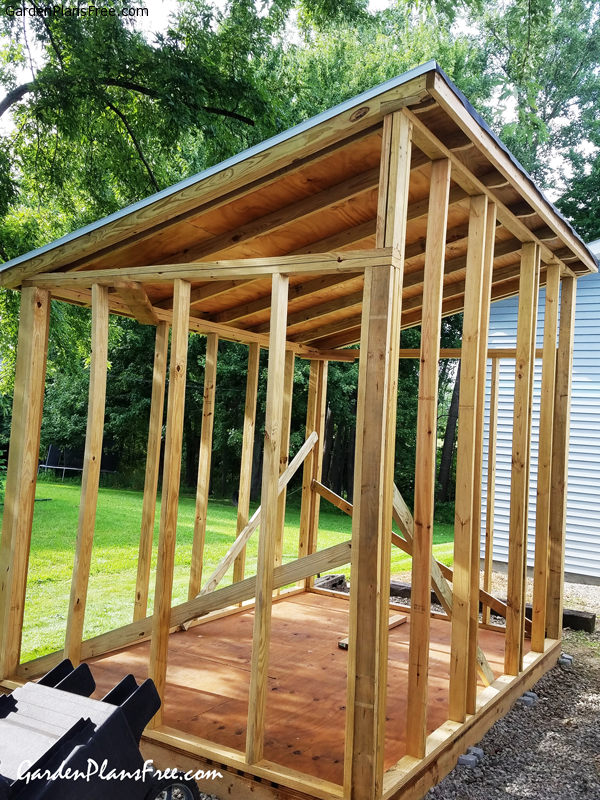
Wall Framing: Cut your 2x4s for the wall studs. Space them 16 inches apart, and use a level to ensure they're plumb.
Floor Joists: Lay down floor joists across the foundation. Use a level to make sure they're parallel and even.
Wall Assembly: Attach the studs to the floor joists and create a framework for your walls.
Roof Framing: Create the roof trusses using 2x6s or 2x8s. You can buy pre-made trusses, or you can construct them yourself.
Roof Sheathing: Attach the plywood or OSB sheathing to the roof framing. Make sure to seal any gaps.
Step 5: Adding Siding, Roofing, and Doors/Windows
Time to give your shed its personality!
Siding: Install your chosen siding material, whether it's vinyl, wood, or metal. Follow the manufacturer's instructions carefully.
Roofing: Apply your roofing material. If you're using shingles, start at the bottom and work your way up.
Doors and Windows: Install your doors and windows. Make sure the frames are level and plumb.
Finishing Touches: Add trim, paint or stain the exterior, and install any necessary hardware.
Step 6: Insulating and Finishing the Interior
If you plan to use your shed year-round, insulation is a good idea.
Insulation: Install insulation in the walls and roof. You can use fiberglass batts or foam boards.
Interior Finish: Add drywall or paneling to the interior walls. You can also add a floor covering like carpet or vinyl flooring.
Electrical: If you need electricity, consult with an electrician.
Important Tips for a Budget-Friendly Build:
Shop around: Compare prices from different lumber yards and hardware stores.
Look for sales: Watch for sales and clearance items.
Reclaimed materials: Consider using salvaged materials like wood or metal.
DIY it: Don't be afraid to tackle tasks like cutting lumber and installing siding.
Ask for help: If you're not comfortable with certain tasks, don't be afraid to ask for help from a friend or family member.
Remember: Building a shed from scratch takes time, effort, and patience. Don't expect it to be a quick project. But the feeling of accomplishment when you're done, and the satisfaction of creating something with your own hands, is incredibly rewarding!
No comments:
Post a Comment
Note: Only a member of this blog may post a comment.